Review Item Locations
A utility to quickly review and edit multiple sales order allocations by location.
Introduced the Summer of 2011. Review Item Locations is a quick way to search and select particular items in a specific location and view all the allocations associated with it. The allocations can also be edited or deleted.
Each column of information is sortable by clicking the column header. Clicking the header again will reverse the sort order of the column. A plus (+) or minus (-) sign appears next to the column header to indicate that the grid is sorted on this column in ascending (+) or descending (-) order. The grid can be sorted on only one column at a time.
Recent Modifications
Spring 2015
- Added Grid Extra and Grid Search to Item-Locations grid.
Spring 2014
- Added Allocate by Priority functionality.
Spring 2013
- Line items (lower left) show Dig Method. Allocations will use 'Allocate by Dig Method' if selected in AR Setup.
Spring 2012
- Added 'Refresh Data' button to capture any changes made to inventory since the form was opened.
- Added 'Reallocate All Listed Item Locations' button. This will reallocate every line item allocated to every location currently displayed in the top grid.
- Added Master Orders.
Fall 2011
- Added 'Move Selected Order Allocations' to the New Allocation grid.
The layout
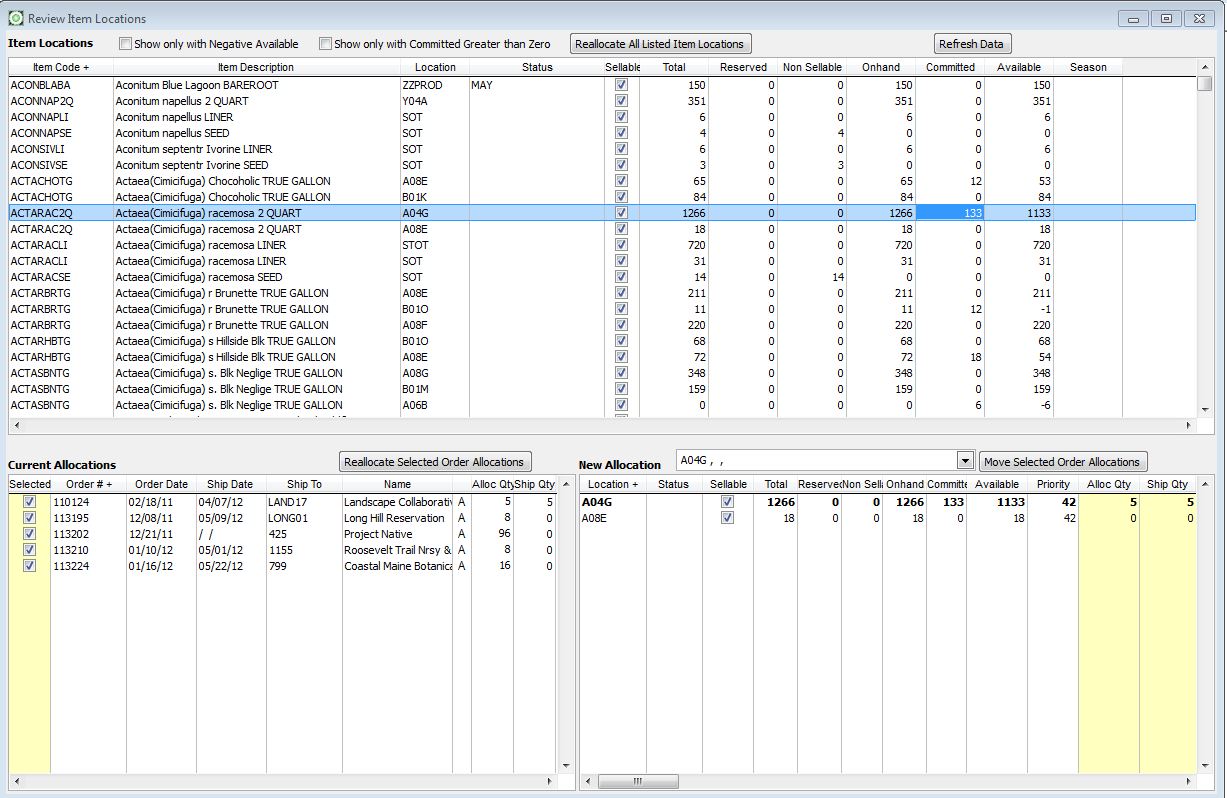
Item Locations Grid
When the application loads every item in you inventory, that has one or more locations, is displayed in the top grid labeled 'Item Locations'. Selecting an item with a committed quantity will cause the bottom left grid labeled 'Current Allocations' to display all the open sales orders with this item. As each order is selected, the grid at the lower right labeled 'New Allocation' displays all the locations containing this item and shows the which location(s) are currently allocated as well as the quantities of each.
This grid may be filtered to show only records with negative quantities and/or only records with a committed quantity greater than zero by way of the check boxes labeled accordingly.
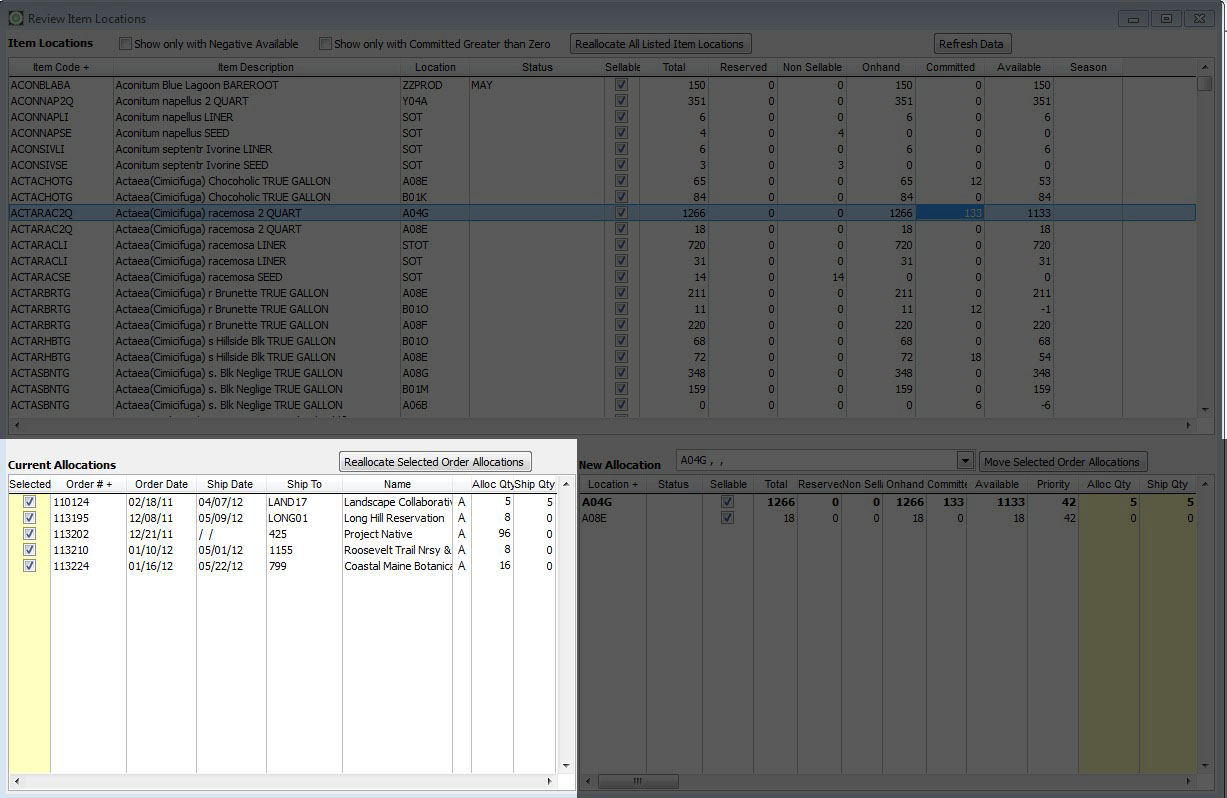
Current Allocations Grid
The lower left corner of the form shows Current Allocations to the selected Item-Location record in the Item Locations Grid (top grid). The order number, order date, ship date, ship to customer code and name, allocation method (A for Auto M for Manual), allocated quantity, and shipped quantity are displayed here. This grid may also be sorted by clicking on the header if the column you wish to sort. A column of 'Selected' check boxes is available to include or exlclude allocations from any of the process performed by clicking either 'Reallocate Selected Order Allocations' or 'Move Selected Order Allocations'.
click on any record in this grid to view the current allocation. It will show in bold font in the New Allocation grid.
Reallocate Selected Order Allocations - This button will reallocate only the current allocations that are checked selected.
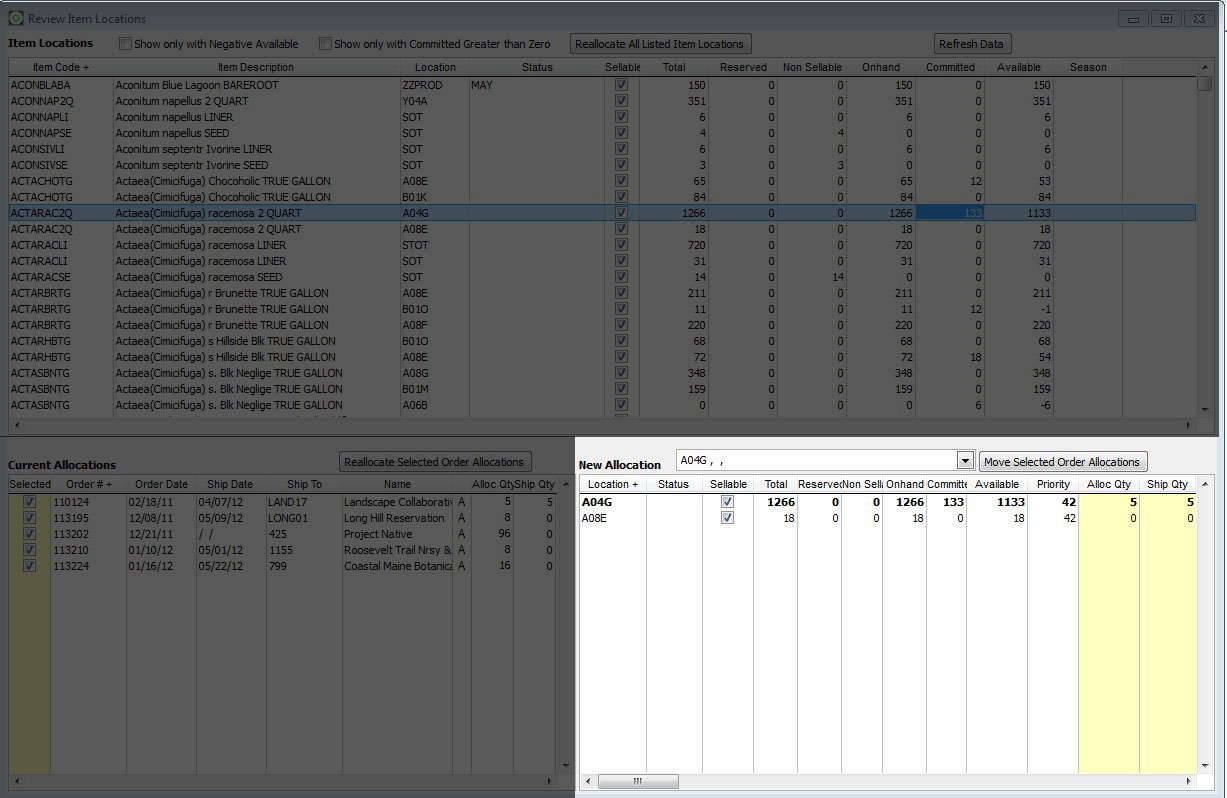
New Allocation Grid
The New Allocation grid shows all the available locations for the item selected in the top grid. The allocation belonging to the active Current Allocation shows in bold font.
You can manually change allocations on this grid simply by changing the quantities in the yellow shaded coloumns. The allocation must be valid (balanced) before you will be able to select a different record in any other grid.
You may also Move all existing Allocations (new Spring 2012) using the Move Selected Order Allocations button. This button will move every allocation selected in the Current Allocations grid to the location,status displayed in the drop down. Moving allocations will mark the new allocations as Manual making them ineligible for future automatic reallocating.
How to Reallocate
Select the item-location to reallocate in the Item Locations grid to display the orders currently committing it. Each instance of that item location is displayed in the Current Allocations grid at the bottom right of the screen. Every instance of this item-location may be reallocated automatically by clicking the 'Allocate Listed Orders' button. Or, click the 'Allocate Selected Order' button to automatically reallocate just the selected line item.
If you prefer to manually allocate, select a line item on the bottom left grid and then manually change the allocated and shipped quantities in the 'New Allocations' grid at the bottom right of the screen. Don't forget to change the previous allocation quantities to zero to prevent over allocating the item.
Items are reallocated in the following manner: First, the existing allocations are deleted. Then the line items are reallocated in Ship Date order ascending. Meaning the orders with the nearest ship dates will be allocated first and orders without ship dates are allocated last. Allocations are made to sellable locations with available quantities only in order of priority (0 being first and 99 last). Manual Allocations are skipped.
Things to Remember
All modifications are saved as soon as you make them. There is not a 'Save' or 'Edit' button on this form. If you change a quantity manually or change them all by pressing one of the buttons, the changes have occurred. If you did not mean to change them or don't like how they were changed, just change them again.
This utility is for modifying existing allocations. It will not allocate items that have not been previously allocated. You must allocate the order or use Pull Orders.